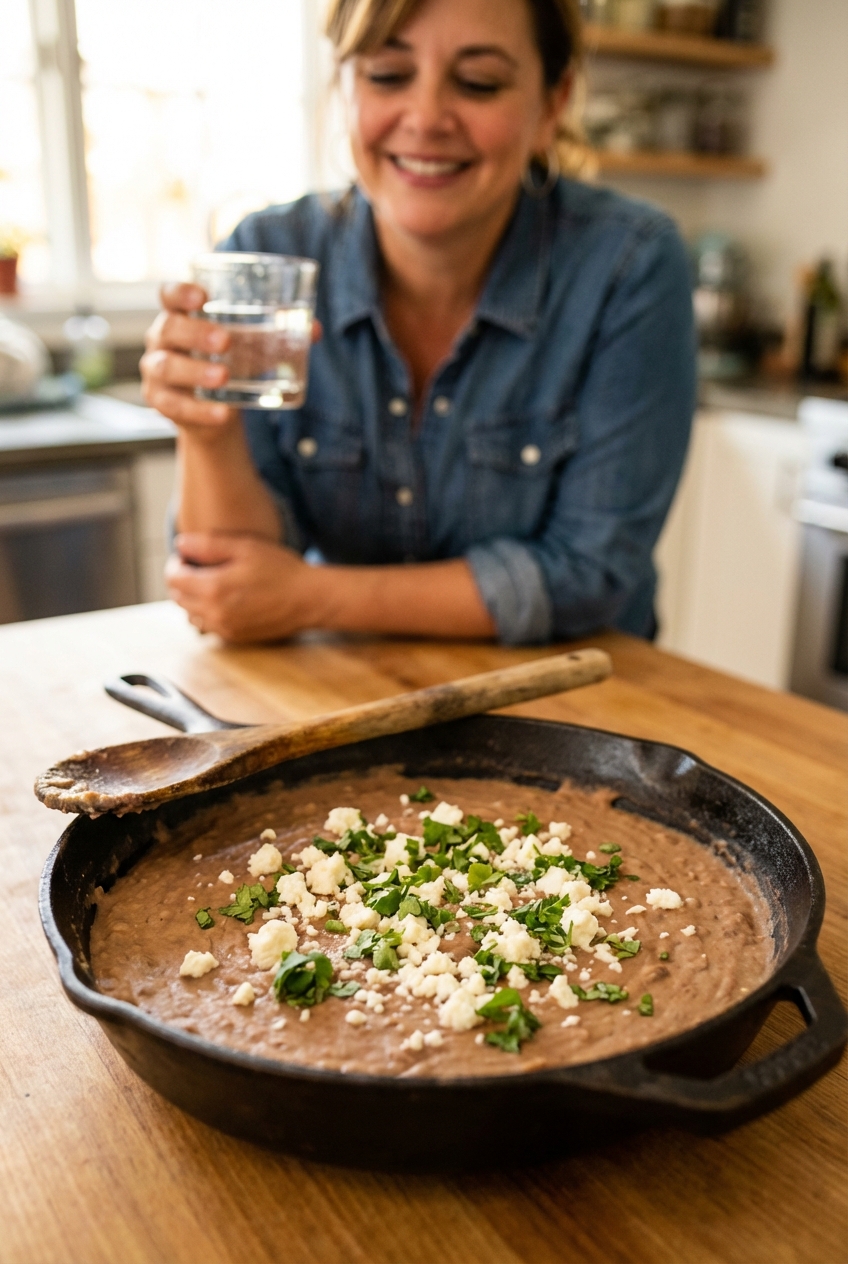
Mom's Best Recipes
Recipe

Classic Skillet Arepas

Golden, crisp-edged corn arepas with a warm spice blend and a fluffy center. Quick enough for a weeknight, irresistible enough to build a whole meal around.

Author By Matt Campbell
4.8
Stack of golden, pan-seared arepas on a rustic plate with a small bowl of herby butter and lime wedges

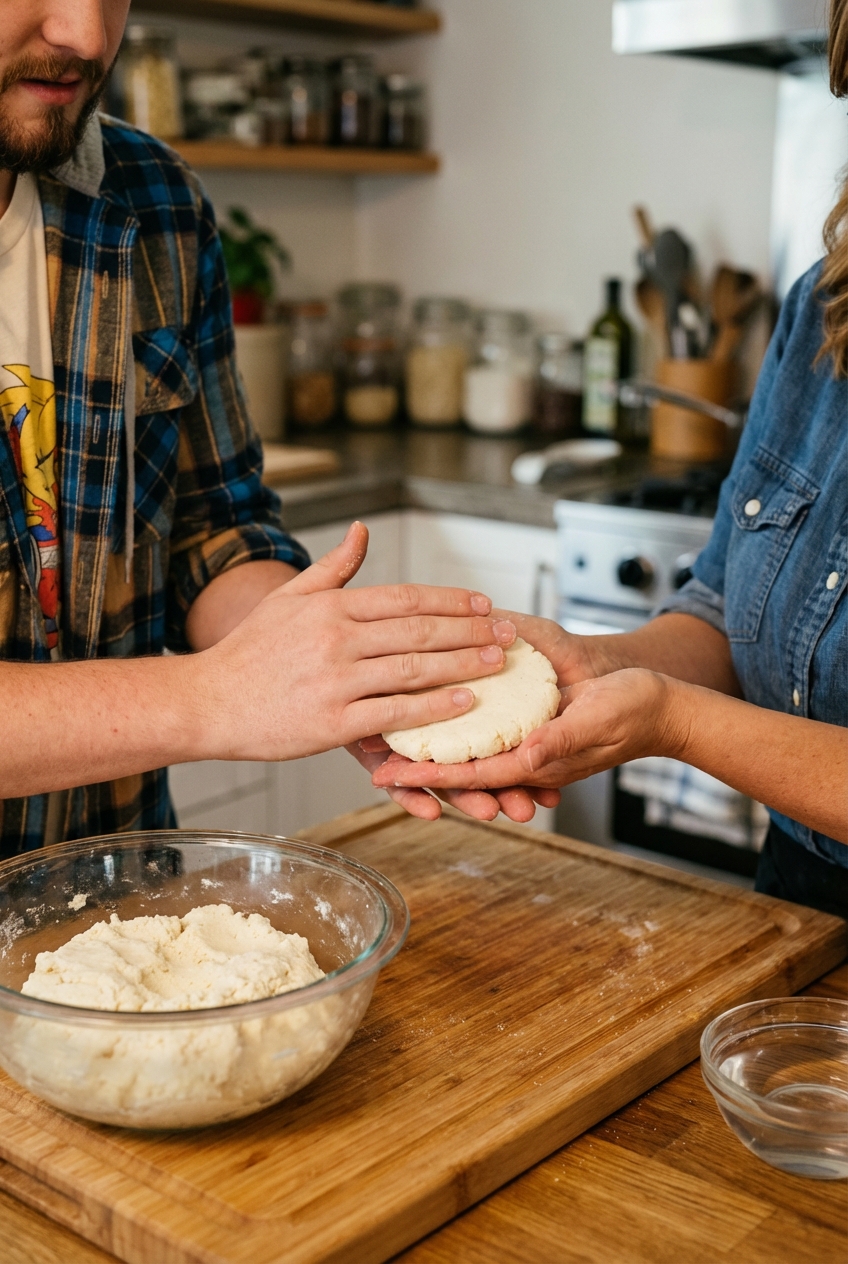
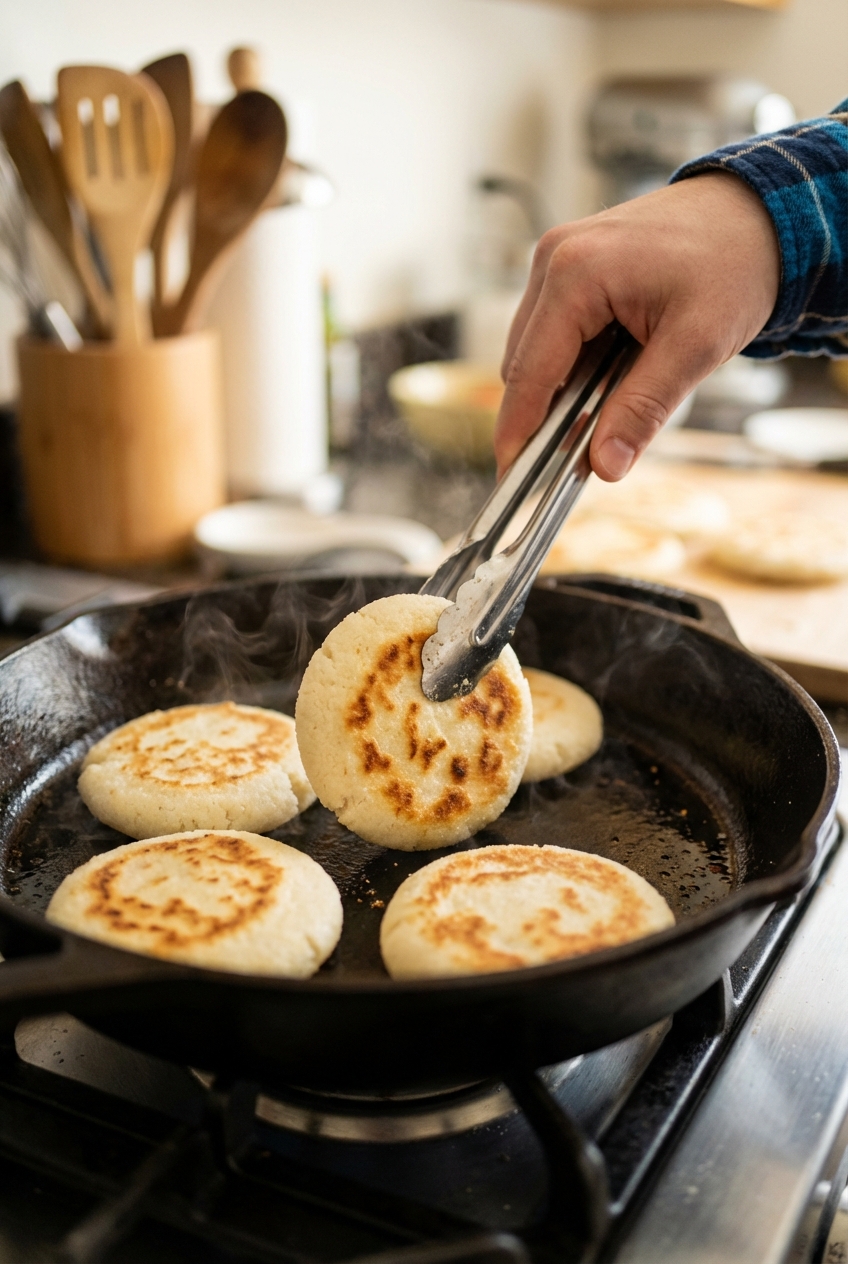
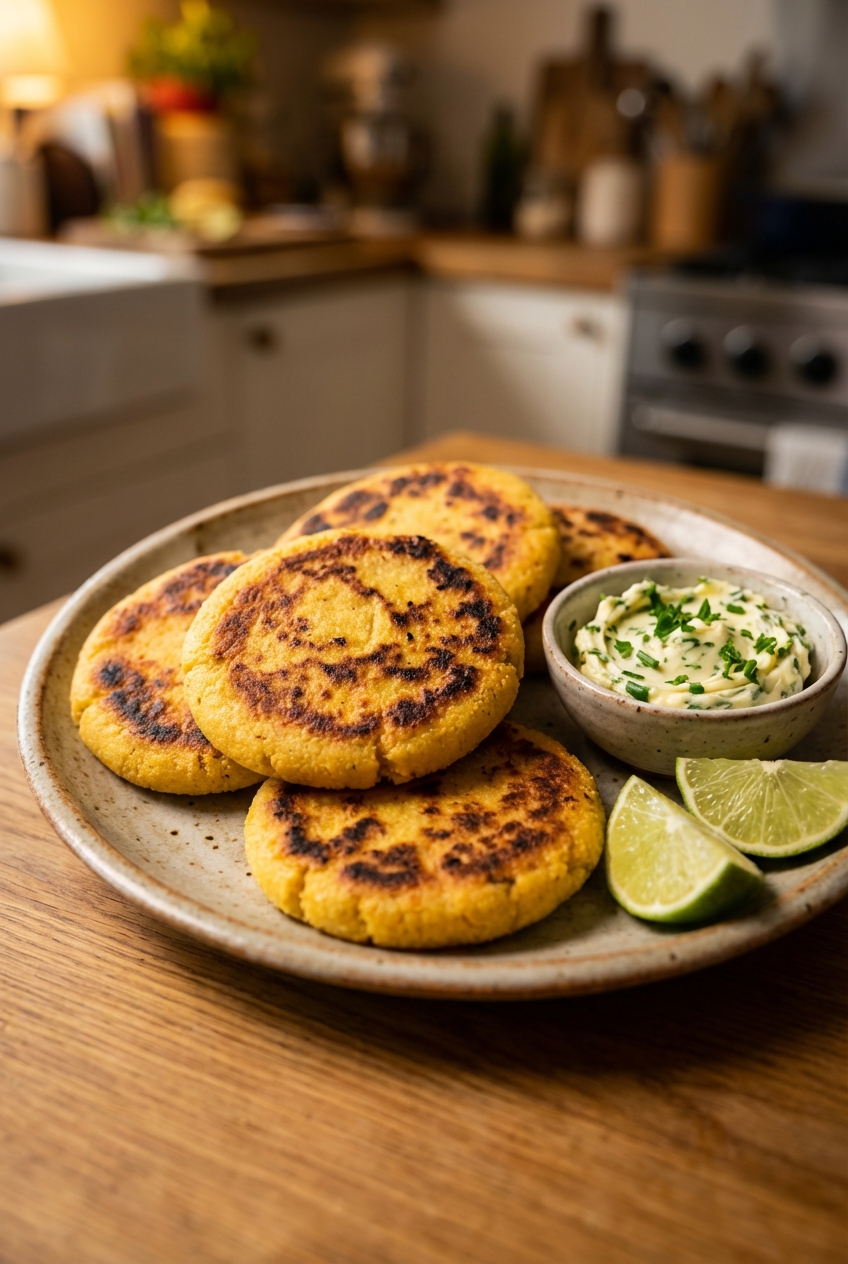
Arepas are one of those foods that make you feel like a kitchen genius even when you are running on fumes. A bowl, a spoon, a hot skillet, and suddenly you have warm corn cakes with crisp edges and a steamy, tender center that begs for butter, cheese, shredded chicken, or whatever is hanging out in your fridge.

This recipe uses a classic masarepa base, then adds a subtle, aromatic twist: a pinch of cumin, smoked paprika, and garlic powder. Nothing loud, nothing fussy. Just enough to make you take a bite, pause, and go, “Okay, wow.”

Mixing bowl with hydrated masarepa dough and a wooden spoon on a kitchen counter

Why It Works

  • Fast dough, no resting drama: Masarepa hydrates quickly, so you get a workable dough in minutes.
  • Crisp outside, fluffy inside: A quick pan-sear builds the crust; a short covered steam finishes the center.
  • Flavor built in: Salt plus a warm spice trio makes the arepas tasty even before fillings hit the party.
  • Flexible size and use: Make them thick for stuffing or thinner for dipping and snacking.

Pairs Well With

Storage Tips

Refrigerate: Cool completely, then store arepas in an airtight container for up to 4 days.

Freeze: Wrap individually (or layer with parchment), then freeze in a zip-top bag for up to 2 months. They reheat beautifully.

Reheat for best texture:

  • Skillet: Medium heat with a tiny bit of oil, 2 to 3 minutes per side until hot and crisp.
  • Oven: 350°F for 8 to 12 minutes (great for multiple arepas).
  • Air fryer: 350°F for 4 to 6 minutes, flipping halfway.

Pro tip: If you plan to stuff them later, reheat first, then slice. Warm arepas split more cleanly without tearing.

Common Questions

What is masarepa, and can I use cornmeal?

Masarepa is pre-cooked corn flour made for arepas (brands like P.A.N. or Goya). Regular cornmeal will not hydrate the same way and can turn out gritty. If you cannot find masarepa, look for pre-cooked/instant corn flour labeled for arepas, not standard cornmeal.

My dough is cracking. What did I do?

It is almost always too dry. Wet your hands and knead in 1 to 2 tablespoons warm water at a time until the surface smooths out and the edges stop splitting when you form a patty.

My arepas are gummy inside. How do I fix that?

They likely need a little more cooking time after the crust forms. After searing, cover the pan and let them steam until hot through, or finish them in a 350°F oven for 5 to 8 minutes.

How do I know they are done?

The arepas should feel firm at the edges with a slight give in the center, and they often sound a little hollow when you tap them. If they feel heavy or damp inside, steam a few minutes longer.

Can I make these dairy-free or vegan?

Yes. Use water (or unsweetened plant milk) and swap butter for olive oil. The spices keep them interesting even without dairy.

How do I slice arepas for stuffing?

Let them cool for 2 to 3 minutes, then use a serrated knife and slice most of the way through, creating a pocket. Think pita, not bagel.

Can I shape them ahead?

Yes. Shape the discs, cover tightly, and refrigerate for up to 24 hours. Let them sit at room temp for 10 to 15 minutes before cooking so they cook evenly.

The first time I made arepas at home, I expected a whole project. Instead, it was weirdly calming: warm water, corn flour, a little salt, and suddenly I had dough that felt like Play-Doh in the best way. Now they are my go-to when dinner needs to happen fast but I still want something with crisp edges and actual personality. The spice blend here is my little shortcut to “restaurant energy” without asking you to buy a suitcase of ingredients.