Mom's Best Recipes
Recipe

Crispy Chicken Kiev (Herb-Garlic Butter Stuffed)

Golden, crunchy chicken with a juicy herb garlic butter center, plus the sealing and temperature tricks that keep the butter inside where it belongs.

Author By Matt Campbell
4.8
A single crispy Chicken Kiev on a plate with a clean slice opened to show melted herb garlic butter spilling out, golden breaded crust, and a simple dinner setting, real food photography style

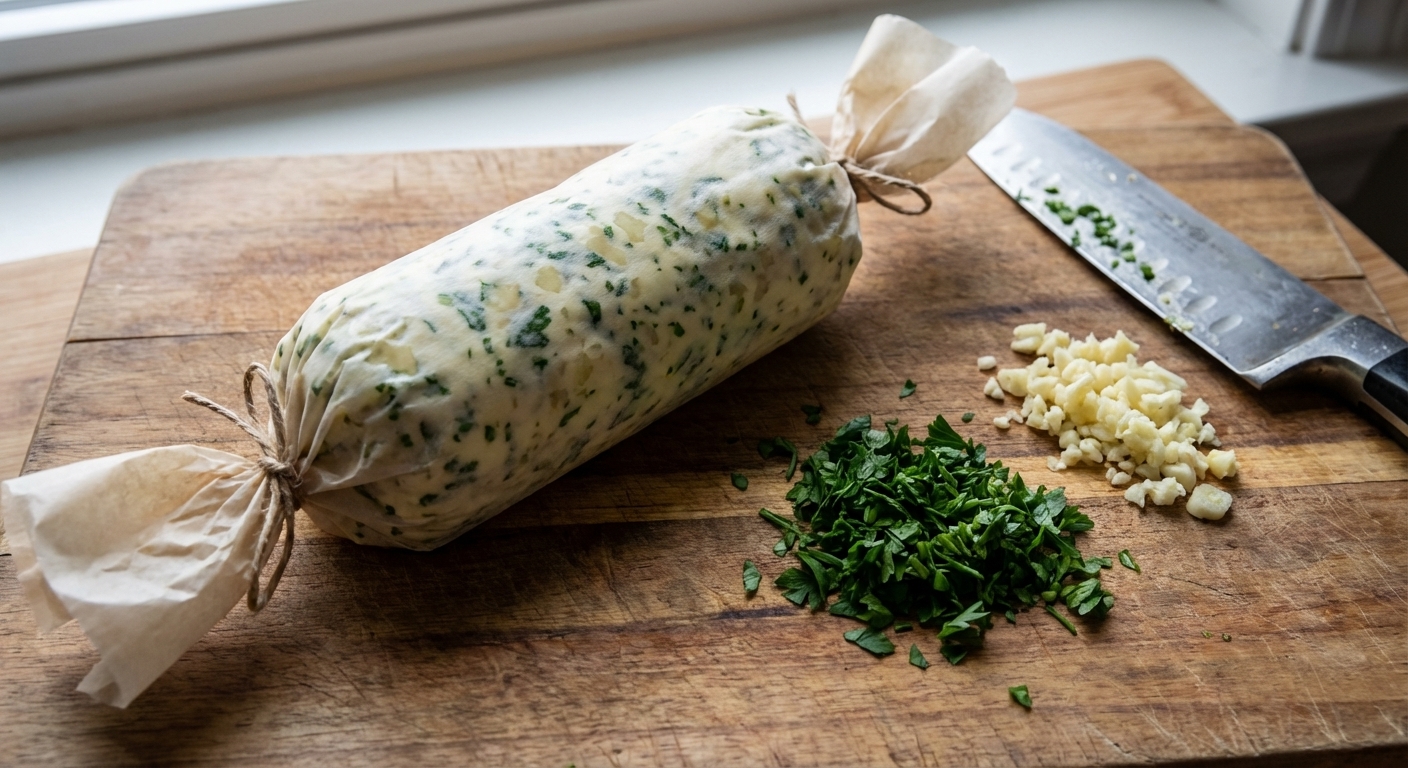
Chicken Kiev is one of those dishes that feels fancy, but it is really just good technique plus very cold butter. You pound a chicken breast thin, tuck in a log of herb-garlic butter, seal it like you are wrapping a tiny, delicious present, then bread it and cook it until the outside is shatter-crisp and the inside goes juicy.

The best part is that dramatic moment when you cut in and the butter rushes out like it has been waiting all day for you to stop being responsible.

Below I am giving you two solid paths: bake (lower drama, still crispy) or shallow-fry (maximum crunch). Either way, you will get the signature butter burst, as long as you follow the sealing tricks and cook to temperature.

A chilled log of herb garlic compound butter wrapped tightly in parchment paper on a cutting board with chopped parsley and minced garlic nearby, real kitchen photography style

Why It Works

  • Chilled compound butter stays put long enough for the chicken to cook, then melts right when you cut in.
  • Pounded chicken cooks quickly and evenly, so you can get a crisp crust without drying the meat out.
  • Double seal strategy (tight wrap plus chilled breading) helps prevent butter leaks in the pan or oven.
  • Thermometer targets keep you confident: safe chicken, not overcooked chicken.
  • Resting is not optional. It lets the butter cool slightly so it flows beautifully instead of exploding onto the plate.

Pairs Well With

Storage Tips

How to Store Leftovers

  • Refrigerate: Let Chicken Kiev cool completely, then store in an airtight container for up to 3 days. Keep a paper towel in the container if you can, it helps protect the crust.
  • Reheat (best for crisp): Bake on a wire rack over a sheet pan at 375°F for 12 to 18 minutes, until hot in the center. Timing varies by size, so use the thermometer if you want to be sure. Avoid the microwave if you want crunch.
  • Freeze: You can freeze uncooked breaded Kievs on a parchment-lined tray until firm, then bag them for up to 2 months.
  • Cook from frozen: Bake at 400°F for about 30 to 40 minutes, or until the thickest part reaches 165°F. If the crust is getting too dark before the center is done, lower the oven to 375°F and keep going.
  • Heads up: The butter can slowly leak out with reheating. It will still taste great, just less dramatic.

Common Questions

Common Questions

What temperature should Chicken Kiev be cooked to?

Cook chicken to an internal temperature of 165°F at the thickest part of the chicken. If you are worried about the butter leaking, pull the chicken from heat around 160°F and let it rest for 5 to 10 minutes, then check the temperature again. Carryover heat often brings it up to 165°F, but the thermometer gets the final vote.

How do I keep the butter from leaking out?

Three things help the most: very cold butter, a tight seam (no gaps), and a chill after breading so the coating sets. If you see a tear in the chicken, patch it with a small piece of chicken or press the meat together, then bread it and chill it.

Can I make Chicken Kiev in the oven only?

Yes. Baking is lower mess. You can also do a quick pan sear for 2 minutes per side to jump-start the browning, then finish in the oven. That hybrid method is my personal sweet spot.

Do I need to use a toothpick?

Not required, but it can help if your seam feels suspicious. If you do use one, remove it before serving.

Can I use chicken thighs instead of breasts?

You can, but it is trickier to wrap cleanly. If you want to try it, use boneless skinless thighs, pound gently, and expect a more rustic shape.

The first time I made Chicken Kiev at home, I treated it like a cooking show challenge and rushed the butter step. I used butter that was cool, not cold. Predictably, it escaped like it had somewhere better to be. The chicken was still good, but my pan looked like it had seen things.

Now I make the butter log first, freeze it while I prep everything else, and I chill the breaded chicken like I am sending it to finish school. It is calmer. It is crispier. It is the kind of dinner that makes you feel like you absolutely have your life together, even if your kitchen is doing a light impression of a disaster movie in the background.