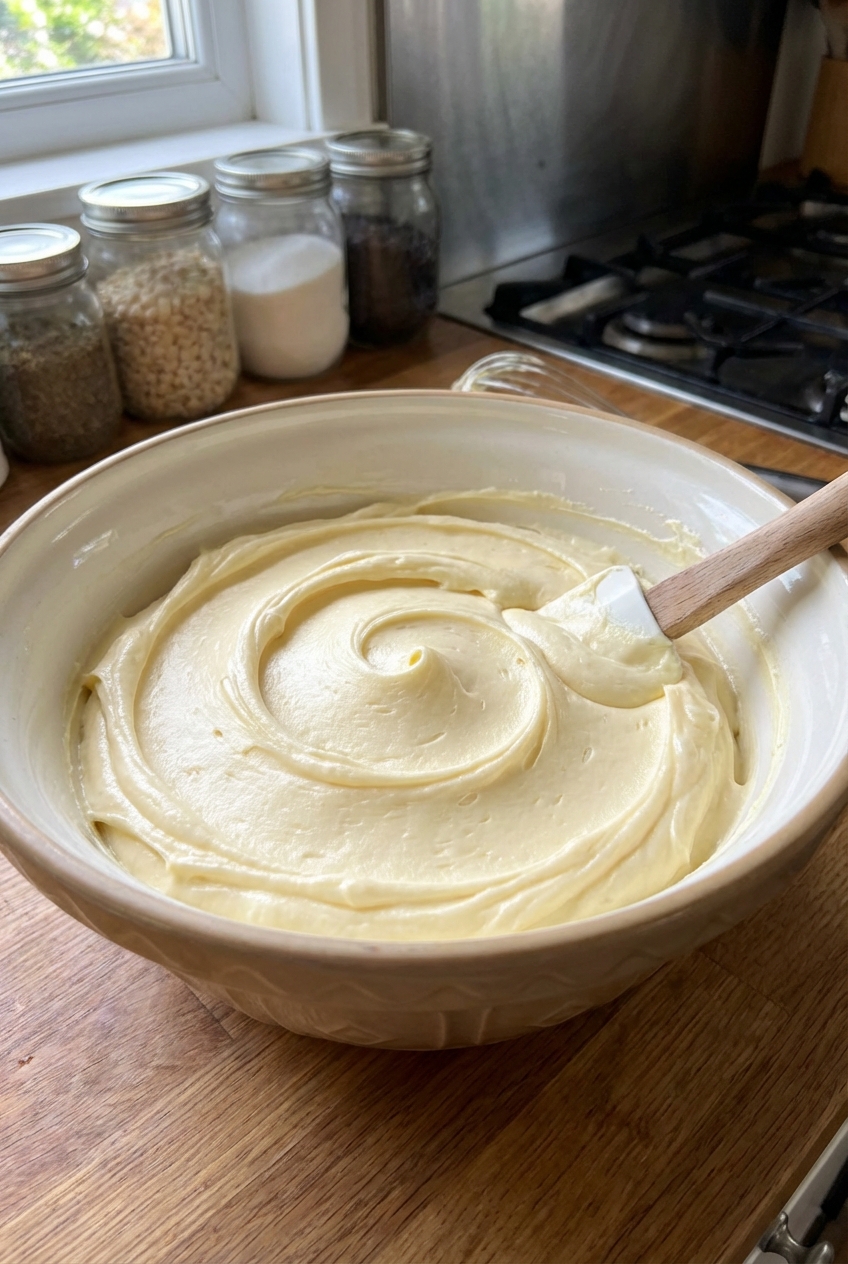
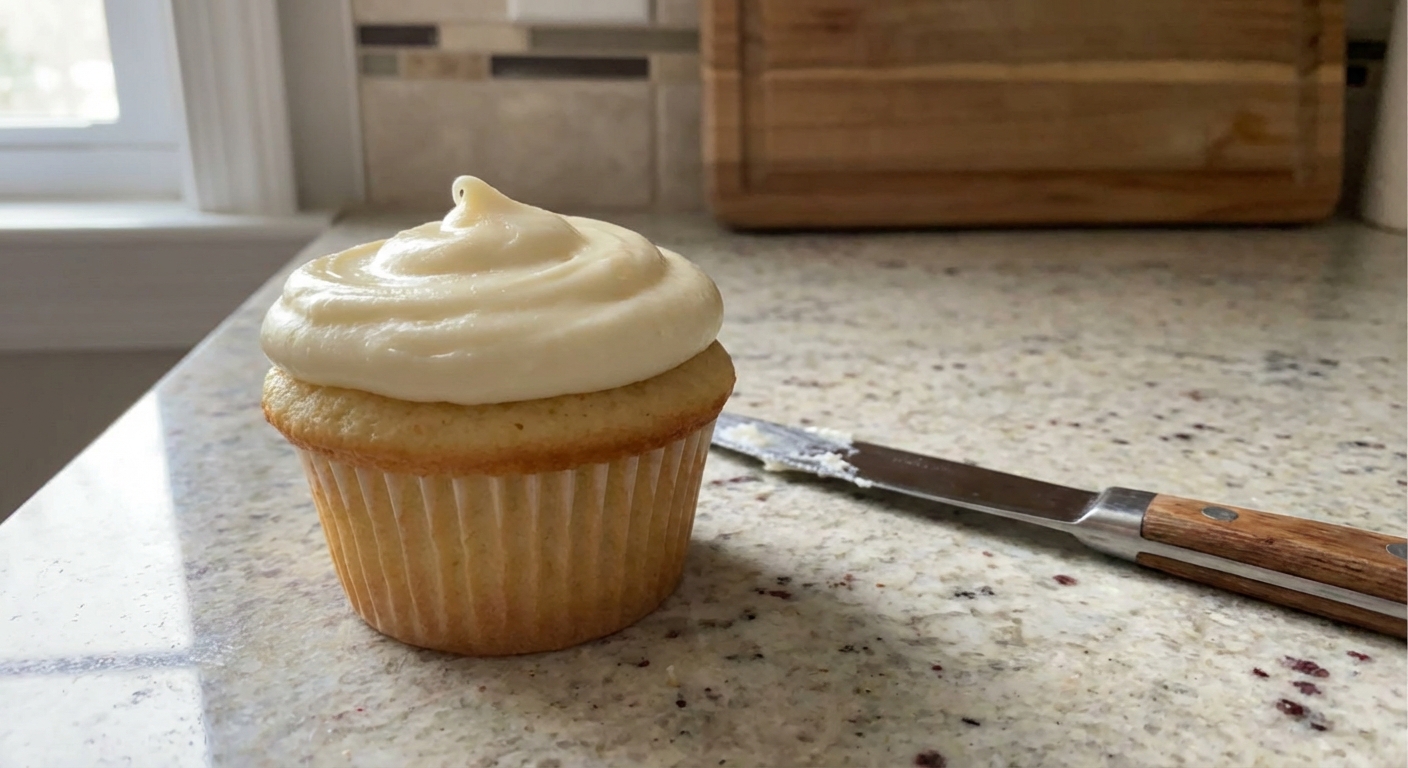
Mom's Best Recipes
Recipe

Elegant Red Velvet Cake

A juicy, tender red velvet layer cake with a cocoa-kissed crumb and a tangy cream cheese frosting that spreads like a dream.

Author By Matt Campbell
4.9
A two-layer red velvet cake with cream cheese frosting and clean slices on a white cake stand in natural window light

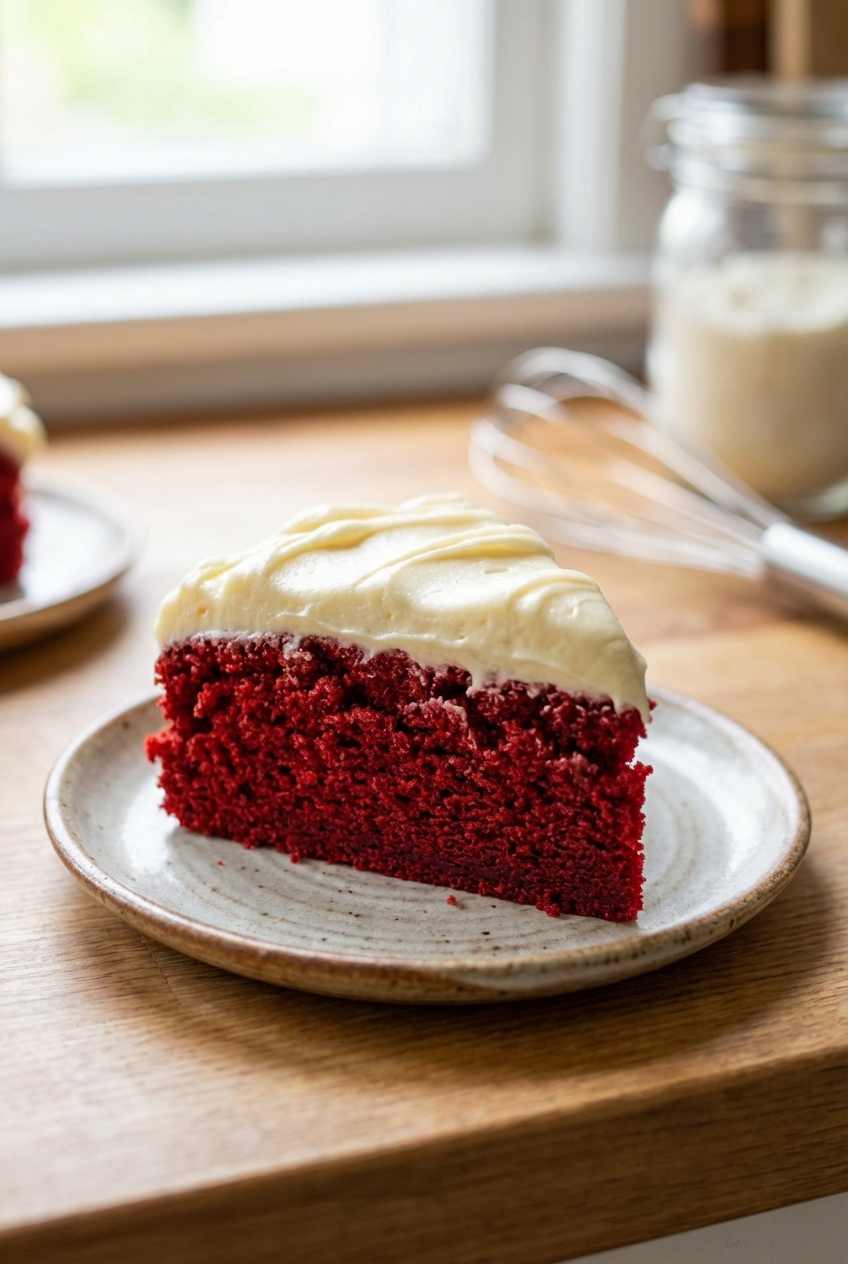
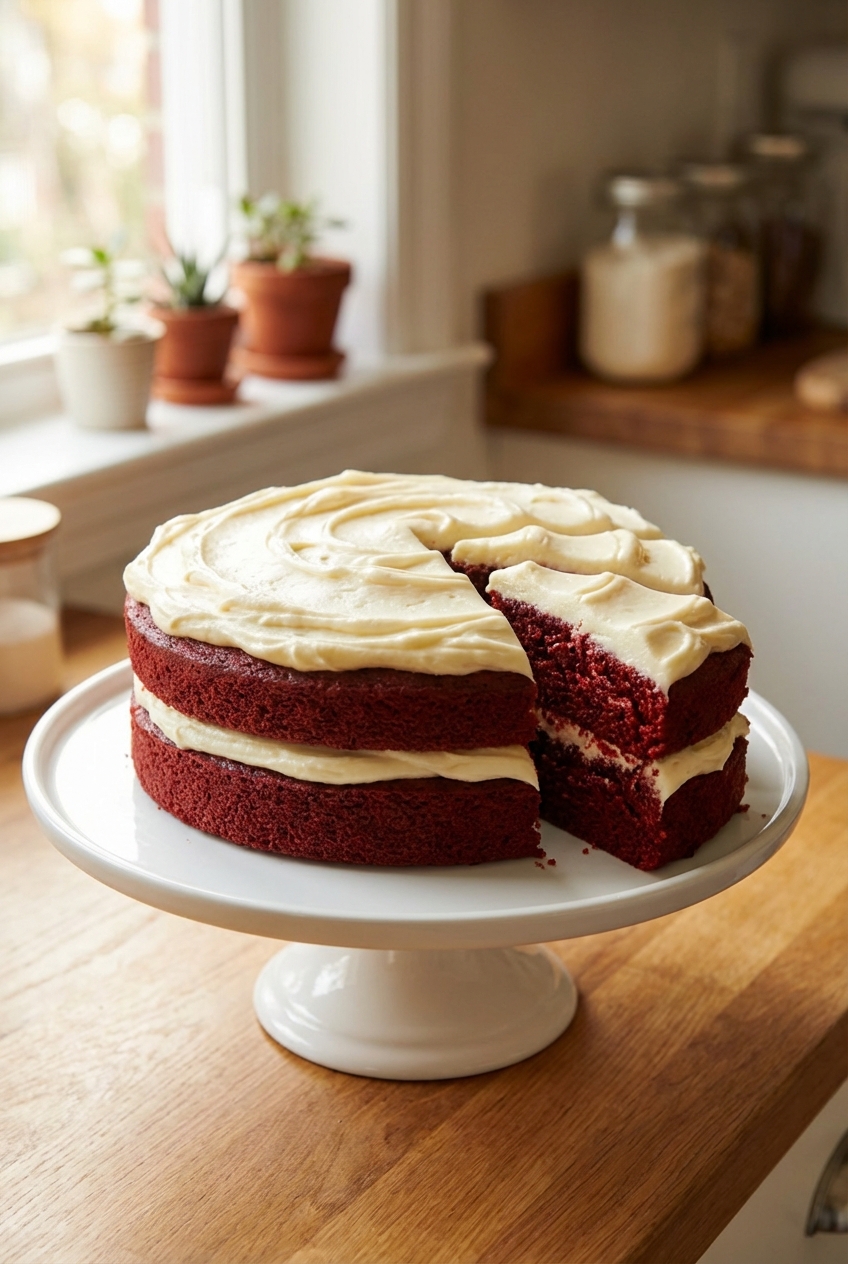
Red velvet cake has a reputation for being fussy. It is also wildly capable of being the easiest fancy-looking cake you make all year. This version is juicy and tender with that classic subtle cocoa vibe, a gentle tang, and a crumb that stays soft even the next day. Basically, it tastes like the bakery version you keep trying to recreate, except you get to lick the frosting spatula in your own kitchen.

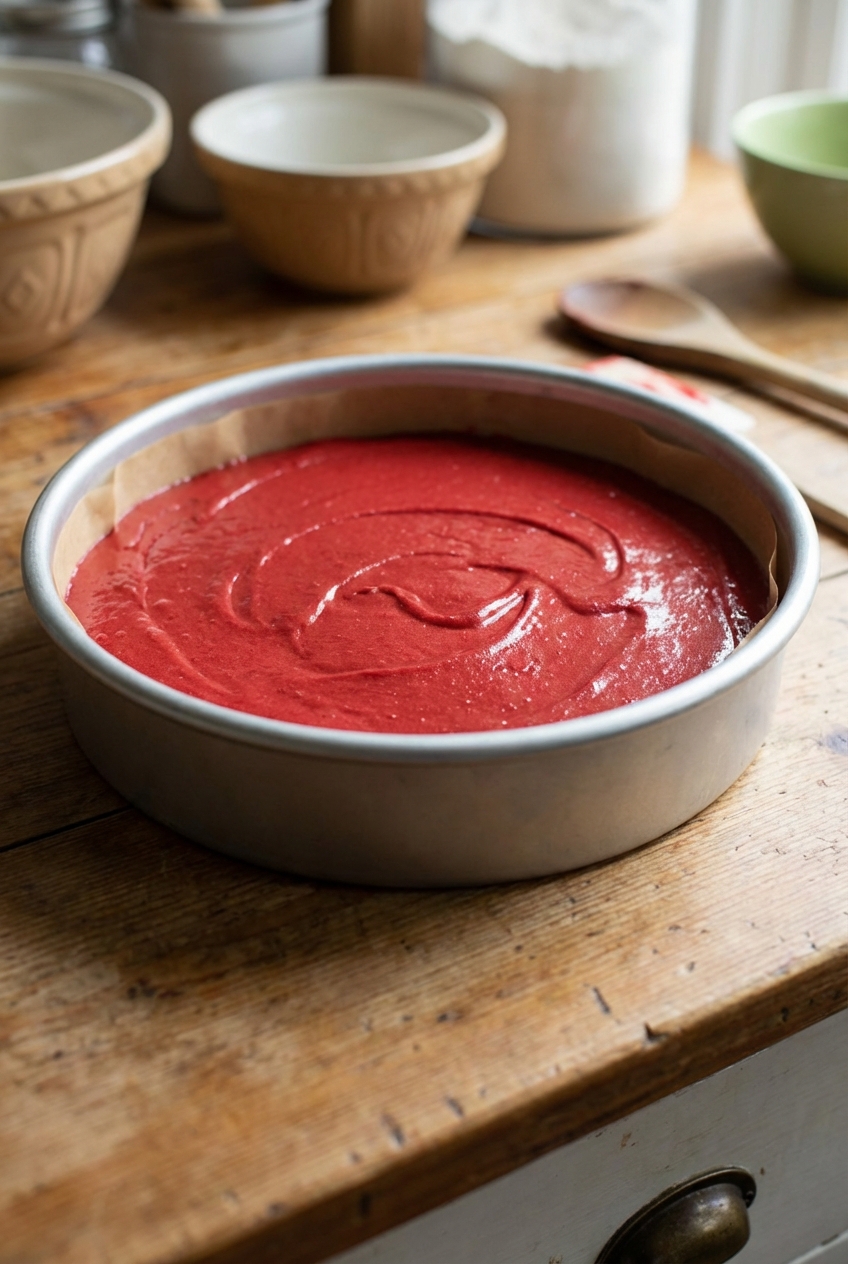
My goal here is simple: accessible ingredients, clear steps, and a few chef-y tricks that make the cake feel elegant without feeling stressful. We are using oil for moisture, an acidic batter for that signature velvet texture, and a cream cheese frosting that is tangy, smooth, and not grainy. You will also get options if you want to go extra polished with a clean finish and crisp edges.

A single slice of red velvet cake showing a vivid red crumb and thick cream cheese frosting on a small dessert plate

Why It Works

  • Velvety, tender crumb: Oil keeps it plush, while buttermilk and an acidic batter encourage that classic soft texture and gentle tang.
  • Bright color without bitterness: We use enough cocoa for flavor but not so much that it turns the cake brown or dry.
  • Reliable rise: A mix of baking soda and baking powder gives lift and a fine crumb, especially in an acidic batter.
  • Frosting that behaves: Slightly chilled butter and a short chill before frosting helps it spread cleanly and hold swirls without sliding.

Pairs Well With

Storage Tips

Keep It Moist

  • Room temp (short term): Cream cheese frosting is perishable, so for food safety, avoid leaving the cake at room temperature for more than 2 hours. If your kitchen is very cool and you are serving the same day, keep it covered and return leftovers to the fridge promptly.
  • Refrigerator: Store covered for up to 4 days. Cream cheese frosting firms up when cold, so let slices sit at room temperature for 20 to 30 minutes before eating for the softest texture.
  • Freezer (best for make-ahead): Freeze unfrosted layers, wrapped tightly in plastic wrap and then foil, up to 2 months. Thaw overnight in the fridge, still wrapped. You can also freeze frosted slices on a sheet pan until firm, then wrap and freeze for up to 1 month.
  • Moisture trick: If the cut edge looks a little exposed, press a piece of parchment or plastic wrap right against it before covering the whole cake. It helps prevent drying.

Common Questions

Is red velvet just chocolate cake with food coloring?

Not exactly. Red velvet is lightly cocoa-flavored, but the real signature is the tangy, tender texture from buttermilk and an acidic batter. It is softer and less “chocolate-forward” than a typical chocolate cake.

Do I have to use buttermilk?

Buttermilk gives the best flavor and crumb. In a pinch, add 1 tablespoon lemon juice or white vinegar to a measuring cup, then fill with milk to 1 cup. Let it sit 5 minutes. It works, but real buttermilk is better if you can grab it.

Why did my cake turn out dry?

Most often: overbaking, overmeasuring flour, or mixing too long after adding flour. Use the spoon-and-level method for flour and pull the cake when a toothpick comes out with moist crumbs, not bone dry.

Can I make this as cupcakes?

Yes. Fill liners about 2/3 full and bake at 350°F for 18 to 22 minutes. You should get about 22 to 24 cupcakes.

Is gel food coloring better than liquid?

Gel gives stronger color with less liquid, which helps keep your batter consistent. Liquid works too, you may just need a bit more to get that classic red. With either one, add color until you like the shade.

I love a cake that looks like it has a dress code but still feels like a hug. Red velvet is that cake for me. The first time I made it, I was chasing the “perfect” crumb and ended up overmixing like I was trying to win a whisking competition. The cake was fine, but it was not velvet.

Now I keep it simple: whisk the dry, mix the wet, then gently bring them together and stop the second the flour disappears. The reward is that moment when you cut a clean slice and the crumb is bright, tender, and a little bouncy. Add a tangy frosting and suddenly your Tuesday night kitchen looks like it is hosting a very polite dinner party.