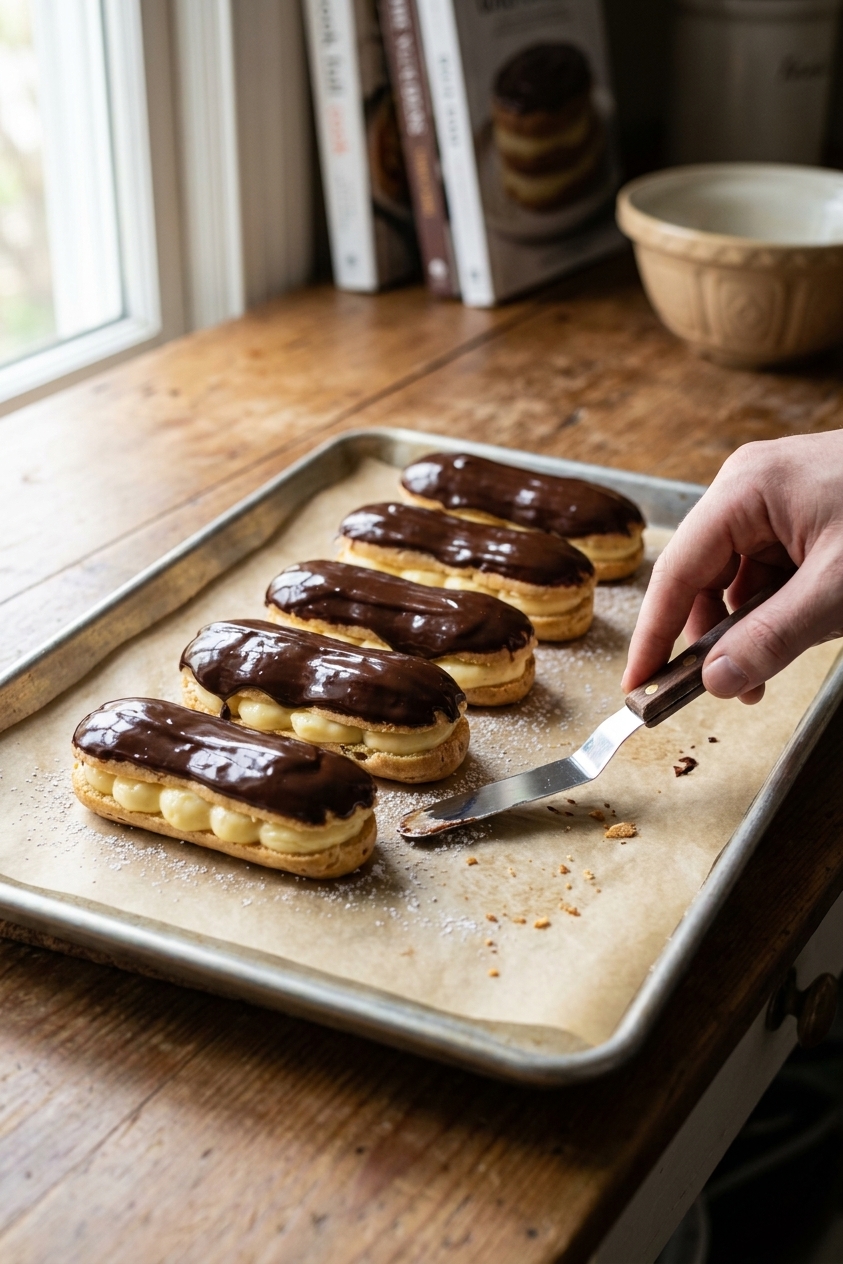
Mom's Best Recipes
Recipe

Homemade Chocolate Éclairs

Crisp choux pastry filled with silky vanilla pastry cream and finished with a glossy chocolate glaze.

Author By Matt Campbell
4.8
A tray of homemade chocolate éclairs filled with vanilla pastry cream and topped with glossy chocolate glaze on a kitchen counter, natural window light, realistic food photography

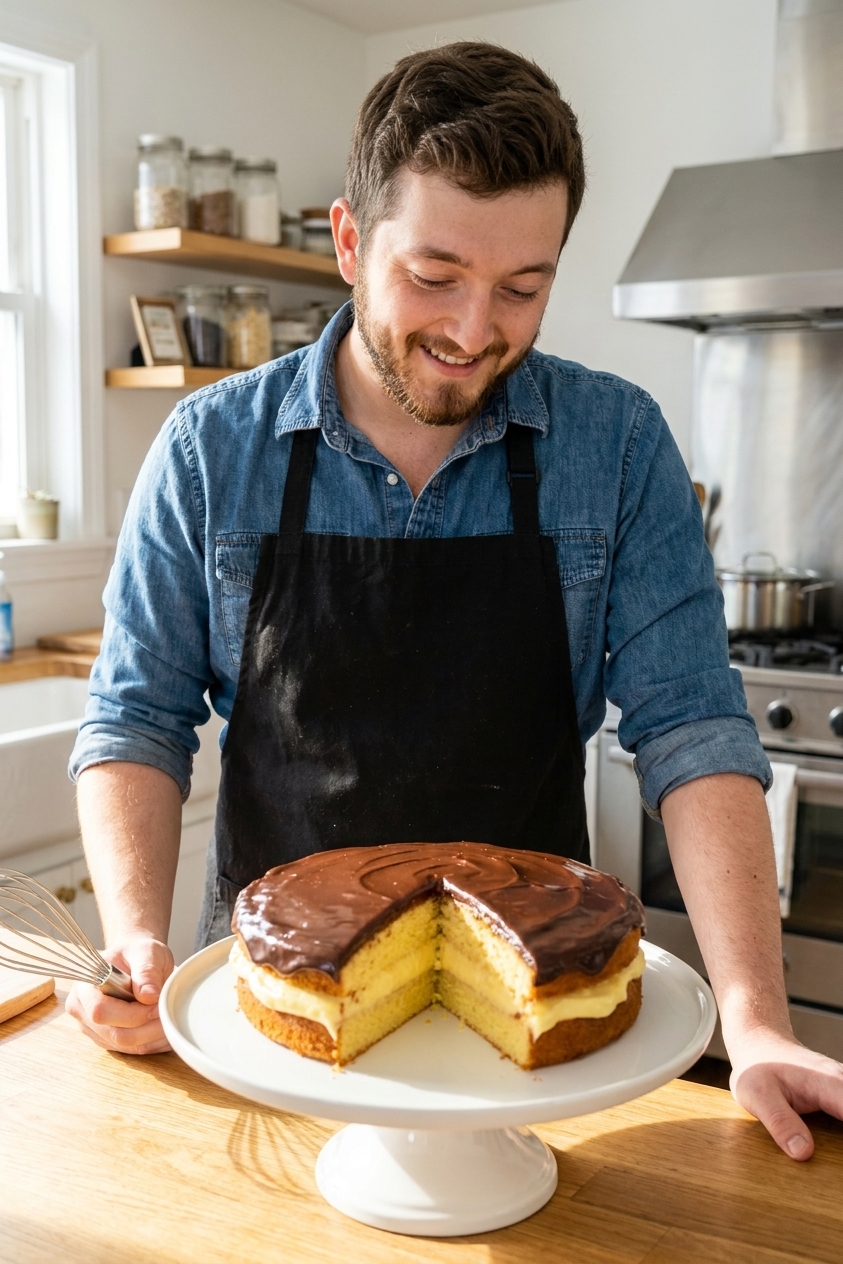
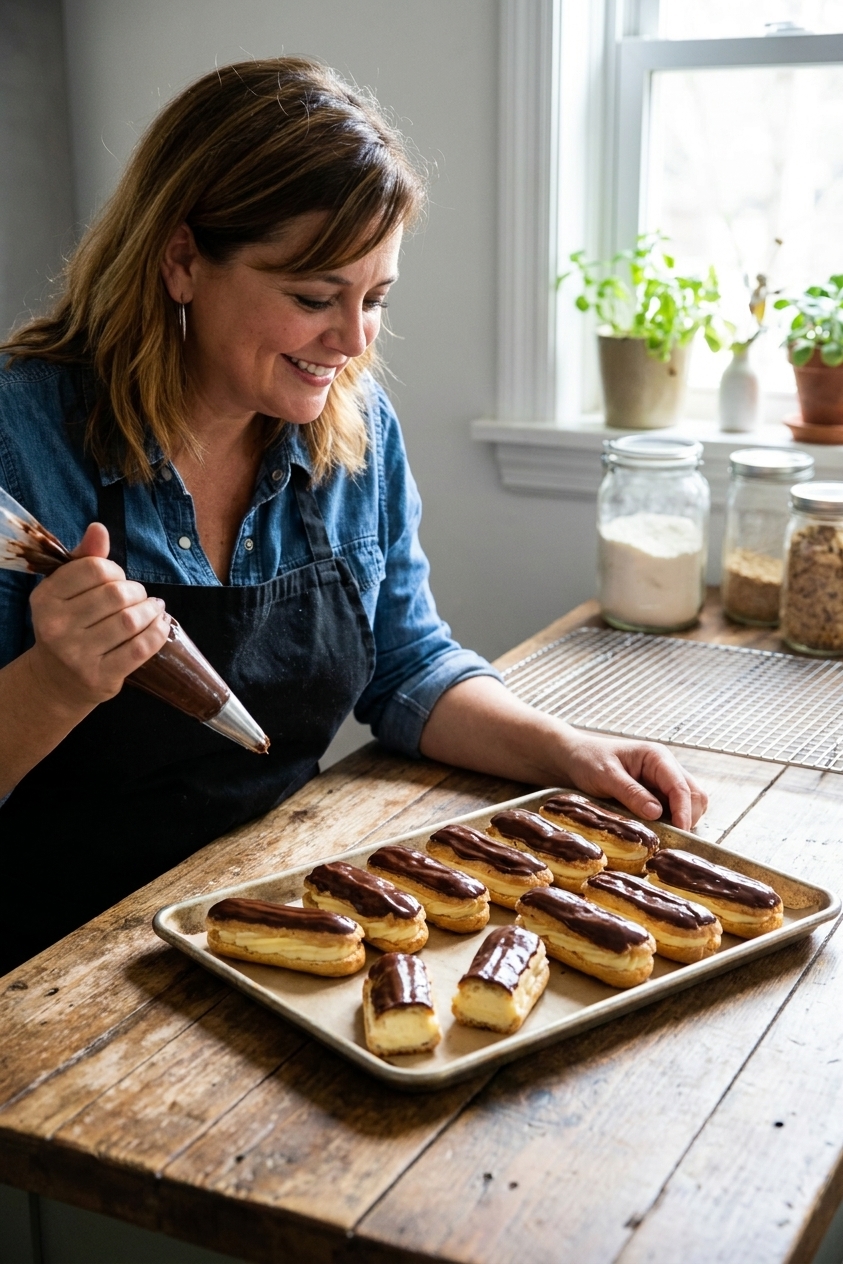
If you have ever looked at an éclair and thought, that seems like a bakery-only situation, I am here to lovingly disagree. Chocolate éclairs are just three friendly components that happen to stack into something dramatic: crisp choux shells, vanilla pastry cream, and a shiny chocolate glaze that makes you feel like you should charge yourself $7.

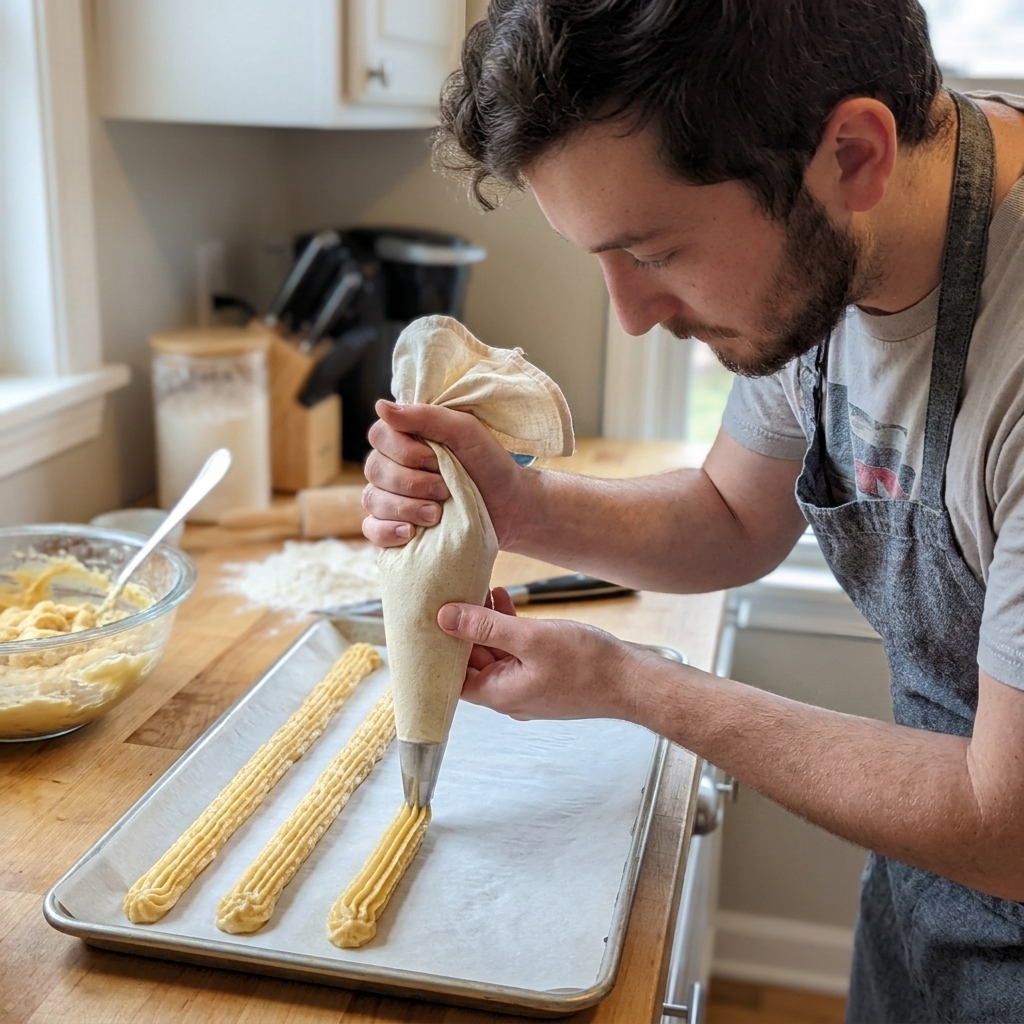
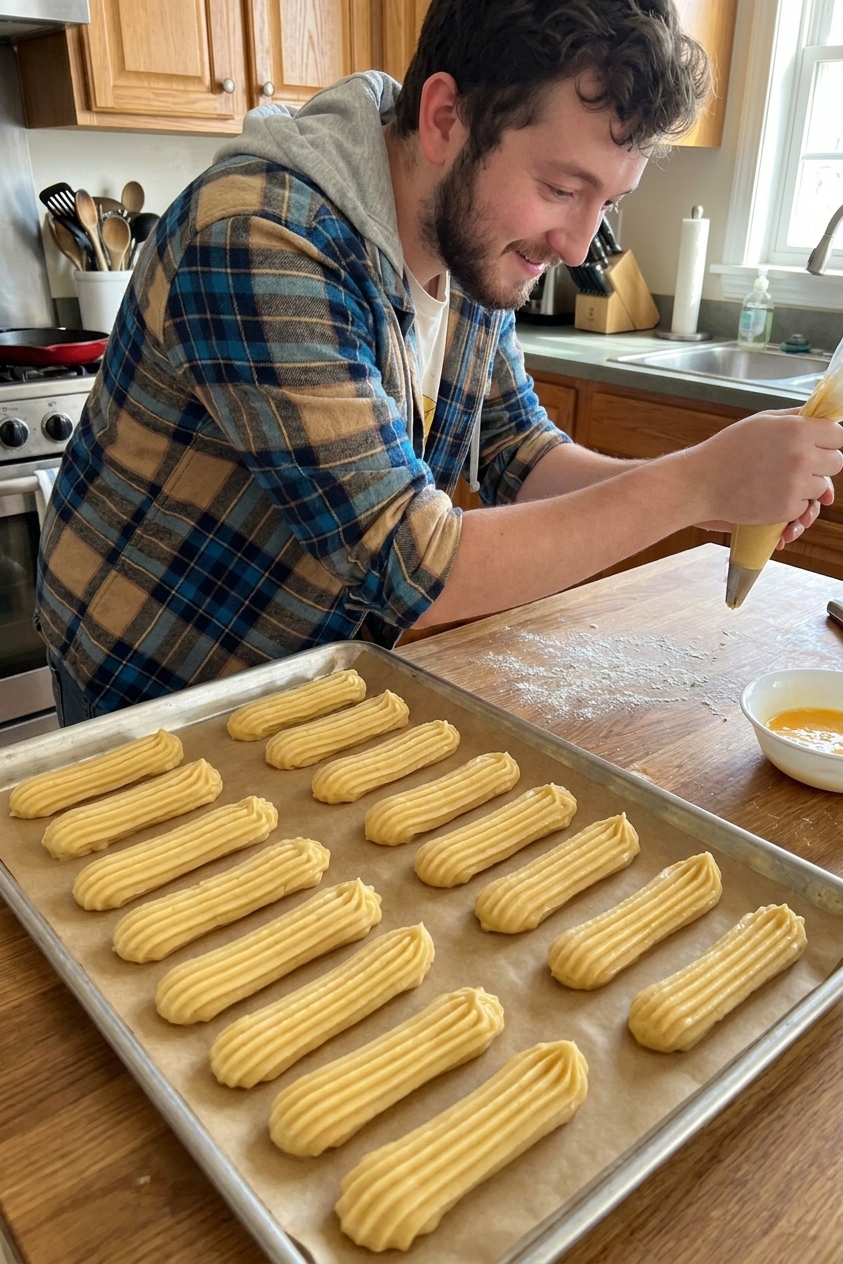
This version is built for real home kitchens. The ingredients are normal. The steps are clear. And I will tell you exactly what to look for while baking so you get shells that are puffed, deeply golden, and dry inside, not sad and soggy. We will also talk piping, because the shape is basically the whole point of an éclair.

A hand piping long lines of choux pastry onto a parchment-lined baking sheet using a pastry bag with a large star tip, realistic kitchen photo

Why It Works

  • Crisp shells that stay crisp: Baking at a higher temp to set the lift, then finishing lower to dry the interiors.
  • Smooth, scoopable pastry cream: Cornstarch plus egg yolks for a thick, silky fill that pipes cleanly.
  • Glossy chocolate glaze: A simple ganache-style topping that sets with a soft shine instead of cracking.
  • Practical piping guidance: Tip choices, sizes, and how to keep your éclairs the same length so they bake evenly.

Pairs Well With

Storage Tips

Make-Ahead and Storage

Best plan

  • Make the pastry cream up to 3 days ahead. Press plastic wrap directly on the surface and refrigerate.
  • Bake the choux shells ahead: They are best within 24 hours, but you can go up to 2 days if you plan to re-crisp before filling.
  • How to store shells: Cool completely, then store at room temp in a container that is mostly airtight. If your kitchen is humid, crack the lid slightly or tuck in a paper towel to absorb condensation.
  • Revive before filling: Re-crisp shells in a 300°F / 150°C oven for 5 to 8 minutes. Cool before filling.
  • Glaze the day you serve for the prettiest finish.

Storing assembled éclairs

  • Refrigerate assembled éclairs in a single layer, loosely covered, for up to 24 hours. They will soften as they sit, which is normal.
  • Freezing filled éclairs: Not recommended for best texture. The cream can weep and the shells can go limp. If you do freeze them anyway, expect a softer result.

Extra pastry cream

  • Keep refrigerated up to 3 days. Use it on fruit, pancakes, or directly with a spoon when nobody is looking.

Best time to serve

  • For peak crispness, serve éclairs within 2 to 4 hours of filling, if you can swing it.

Common Questions

Piping and Baking Cues

What piping tip should I use for éclairs?

A large star tip (like Ateco 869 or a similar open star) gives you ridges that help éclairs rise evenly and reduces cracking. A large round tip works too, but the star tip is the easy win.

How long should each éclair be?

Aim for 4 to 5 inches long and about 3/4 to 1 inch wide. Consistent size matters more than perfection, because uneven éclairs bake unevenly.

How do I know choux is done baking?

  • Color: deep golden brown, not pale.
  • Feel: shells feel light and sound slightly hollow when tapped.
  • Interior: if you split one, it should be mostly dry inside with just a thin tender layer.

If your éclairs look great but collapse later, they were almost always underbaked or not dried enough.

Common Choux Issues (and Fixes)

My éclairs did not puff

  • Likely cause: incorrect egg amount. Too little egg makes the dough stiff and it cannot expand. Too much egg makes it loose and it cannot hold structure.
  • Fix: Add eggs gradually and stop when the dough makes a smooth V-shape from the spoon or paddle. If it is stiff and tears, beat in a little more egg (a tablespoon of beaten egg at a time). If it is runny and cannot hold a ridge, it is over-egged and you may need to start over for best results.
  • Also check: oven fully preheated. Choux needs that initial heat to create steam and lift.

My éclairs puffed, then collapsed

  • Likely cause: underbaked shells with a wet interior.
  • Fix: Bake until deeply golden, then dry them longer at a lower temperature. You can also poke a small hole in each end for steam release during the last 5 minutes.
  • Do not open the oven early. Wait until they are set and browned.

My shells are cracking badly

  • Likely cause: oven too hot, dough too dry, or no ridges.
  • Fix: Use a star tip for ridges and consider dropping your oven temp by 10 to 15°F if your oven runs hot. You can also brush piped lines lightly with water to smooth sharp peaks.

My éclairs are soggy

  • Likely cause: not dried enough, or filled too far ahead.
  • Fix: Re-crisp unfilled shells at 300°F for 5 to 8 minutes. Fill closer to serving time.

My choux dough is greasy or separated

  • Likely cause: adding eggs while the panade (flour paste) is too hot, or too many eggs too fast.
  • Fix: Let the dough cool for 5 minutes before adding eggs. Add eggs one at a time, fully mixing between additions. If it looks broken, keep mixing, it often comes back together.

The first time I made éclairs at home, I treated choux pastry like it was a wild animal. I did not blink. I did not breathe. And I definitely did not open the oven door, because the internet had me convinced they would collapse out of spite.

Now I make them like I cook most things: curious, slightly chaotic, and always tasting. Once you learn the cues, especially what “done” looks like, éclairs stop being scary and start being one of those desserts that makes people think you have a secret life as a pastry chef.