Mom's Best Recipes
Recipe

Honey Garlic Chicken Thighs (Skillet)

Crispy chicken thighs glazed in a sticky honey garlic sauce, all in one skillet in about 30 minutes. Sweet, savory, and dangerously spoonable over rice.

Author By Matt Campbell
4.8
A cast iron skillet filled with crispy skin-on chicken thighs coated in a glossy honey garlic glaze, with caramelized edges and a few sliced green onions scattered on top, warm kitchen lighting, photorealistic food photography

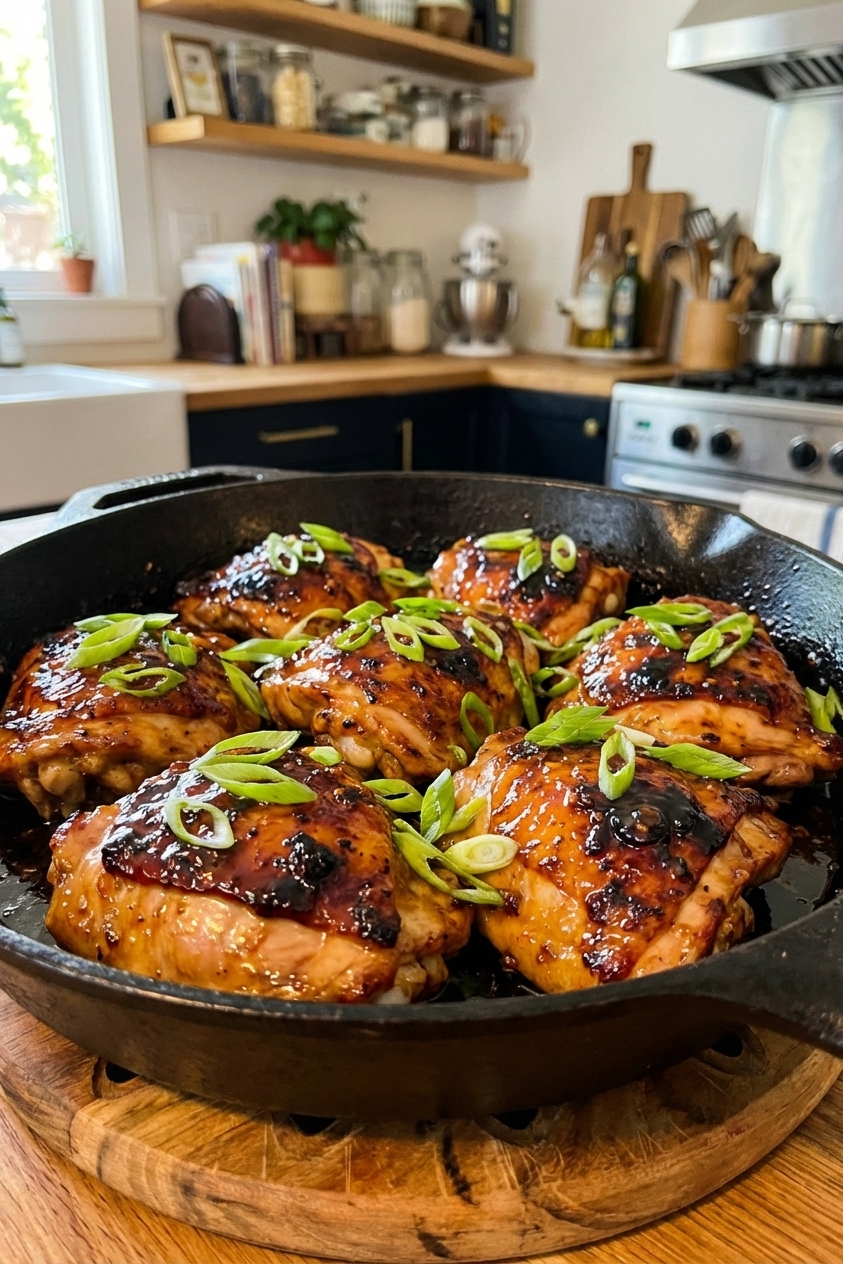
If you want the kind of dinner that makes everyone wander into the kitchen asking, “What smells like that?”, this is it. These skillet honey garlic chicken thighs hit the sweet spot between weeknight-easy and feels-a-little-fancy satisfying. We are talking crackly, crispy skin first, then a sticky honey garlic glaze that reduces right in the pan and clings to every nook.

The key is timing. We crisp the skin before the sauce ever touches the skillet, because honey and crispy skin have a complicated relationship. Add the glaze too early and you get soft, steamed skin and a pan that wants to burn. Do it in the right order and you get crisp edges, juicy chicken, and a shiny, caramelized coating that practically begs for rice.

A close-up of a single crispy skin-on chicken thigh being lifted with tongs from a skillet, showing golden crackly skin and rendered fat in the pan, photorealistic kitchen action shot

Why It Works

  • Crispy skin, the best odds: Start skin-side down in a hot skillet and do not move the chicken until it releases on its own.
  • Sticky glaze without burning: The sauce goes in after the chicken is mostly cooked, then reduces quickly while you spoon it over the thighs.
  • Big flavor, small ingredient list: Honey, garlic, soy sauce, and a splash of vinegar make a balanced sweet-savory sauce in minutes.
  • One-pan rhythm: Render the chicken fat, build the glaze in the same skillet, and let the browned bits do the heavy lifting.

Pairs Well With

Storage Tips

How to Store and Reheat

Refrigerate: Store leftover chicken and sauce in an airtight container for up to 4 days.

Freeze: Freeze in a freezer-safe container for up to 2 months. Thaw overnight in the fridge for best texture.

Reheat (best method): Warm the chicken in a skillet over medium-low with a splash of water. Cover for 3 to 5 minutes to heat through, then uncover and spoon the sauce over the top. Reheat until the chicken is hot throughout (aim for 165°F).

Reheat (quick method): Microwave in 30-second bursts until hot. The chicken will still taste great, but the skin will not stay crispy.

Crispy-skin comeback: If you care about crispness, reheat the thighs skin-side up in a 400°F oven or air fryer for 5 to 8 minutes, then brush with warmed sauce.

Common Questions

Common Questions

How do I get the skin extra crispy?

Three rules: pat the chicken dry, start in a hot skillet, and do not touch it for the first 10 to 12 minutes. Also, do not overcrowd the pan. Crowding traps steam, and steam is the enemy of crispy skin. If your skillet is not truly large (think 12-inch), sear in batches.

Can I use boneless, skinless thighs?

Yes, but you will miss the crisp-skin magic. Reduce the cook time. Sear 3 to 4 minutes per side, then add the sauce and simmer until the glaze thickens and the chicken reaches 165°F.

My sauce tastes too sweet. How do I fix it?

Add a little more vinegar or a squeeze of lemon. A pinch of chili flakes also balances sweetness fast.

How do I keep the honey garlic sauce from burning?

Lower the heat before adding the sauce and keep it moving. Honey caramelizes quickly. If the browned bits in the pan look very dark (borderline burnt), pour off the fat and give the skillet a quick wipe so the sauce stays glossy, not bitter.

Do I need a thermometer?

Not required, but it is the easiest way to avoid dry chicken. Aim for 165°F minimum in the thickest part, near the bone but not touching it. That said, thighs get even more tender around 175 to 190°F, so you have some room to let them go a little longer if you want that pull-apart texture.

This is one of those meals I started making on nights when I wanted something that felt a little extra, but I was not interested in washing a sink full of dishes. The first time I nailed the timing, crisp skin first and glaze last, I caught myself standing over the stove “just tasting” the sauce with a spoon like it was a hobby. Now it is my go-to when I want a quick win: one skillet, loud flavors, and a pot of rice that disappears suspiciously fast.