Why did my cheese sauce turn grainy or oily?
Usually it's one of three things: the pot was still too hot when the cheese went in, you used pre-shredded cheese with anti-caking agents, or you kept cooking after adding cheese. Fix: turn off Keep Warm, stir in dairy first, then add cheese in handfuls and stir gently just until smooth. Avoid boiling and aggressive stirring.
What pasta shape works best in the Instant Pot?
Elbows are the classic and most forgiving. Cavatappi is also great for sauce cling. Avoid very thin pasta shapes that overcook fast. If you use shells, go for medium shells and keep a close eye on timing.
How long should I pressure cook the pasta?
A reliable starting point is half the box time (rounded down), then quick release. Pasta brands and shapes vary, so adjust next time if needed. If your elbows list 8 to 9 minutes, start at 4 minutes. If cavatappi feels too firm, try +1 minute next time. If shells blow out, try -1 minute.
What is the best liquid ratio for Instant Pot mac and cheese?
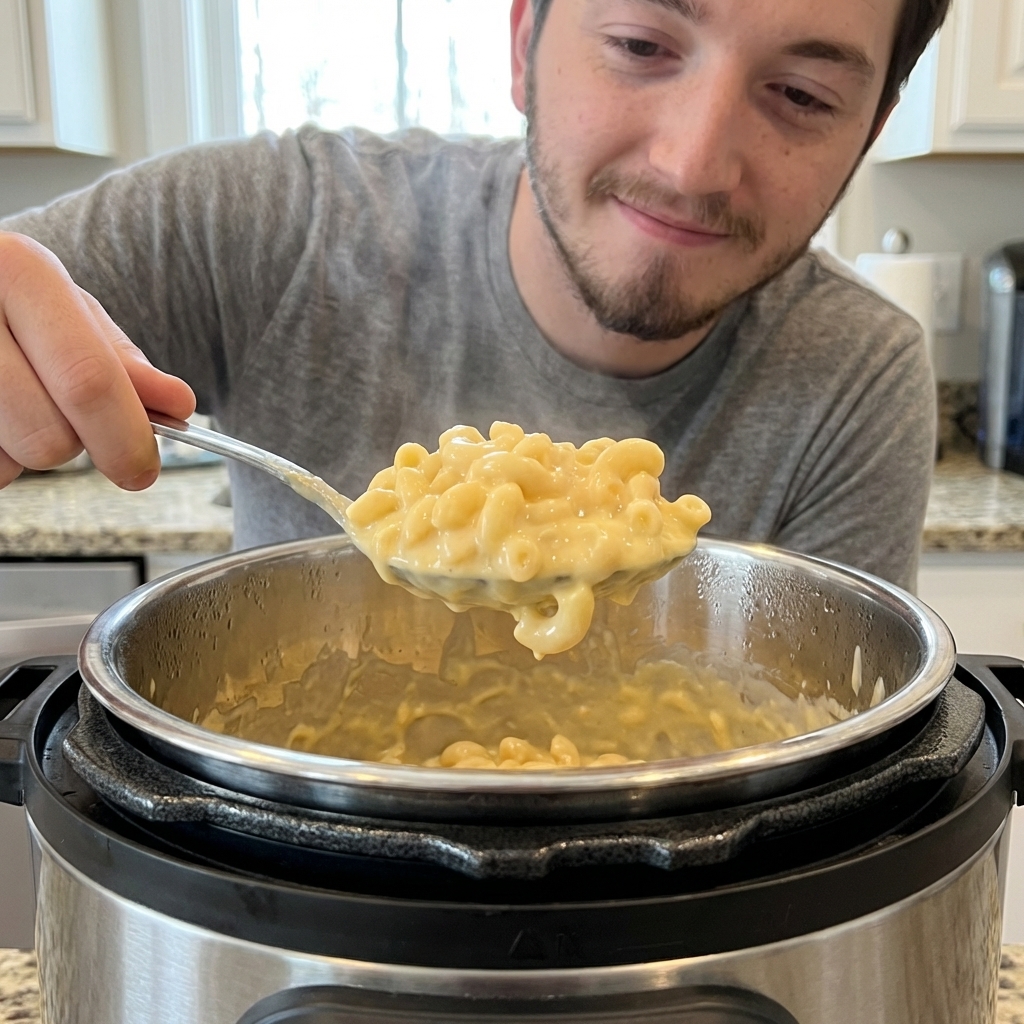
For this recipe: 1 pound pasta to 4 cups broth or water. The pasta should be just barely covered when you nudge it down. Too much liquid mostly makes the final mac soupy, not smoother. The real secret to a sauce that stays creamy is adding dairy and cheese after pressure cooking, off the heat.
Note: If your model is prone to burn warnings, use water instead of broth (broth can scorch more easily) and make sure no noodles are stuck to the bottom before sealing.
Do I really need a quick release?
Yes, for creamy mac. Quick release stops the pasta from continuing to cook in the hot, starchy liquid. If you let it naturally release, you're more likely to end up with soft, blown-out noodles.
I opened the lid and it looks watery. Did I mess up?
Nope. Do not drain it. Stir, then let it sit 2 to 3 minutes. The starch thickens as it cools slightly, and the cheese will finish the job. If it still looks thin after the cheese, use Sauté on Low for 1 to 2 minutes, stirring constantly, then turn it off again before adding more cheese.
Can I double it for a crowd?
You can, as long as you do not fill the pot past the Max line and you're using at least a 6-quart model. The pressure cook time is usually the same, but it may take longer to come to pressure. Big, starchy loads can foam, so keep an eye on the fill level and do a careful quick release. If the finished mac is thinner than you want, let it sit a few minutes or use a brief Low Sauté to tighten it up before adding extra cheese.
How do I add a crunchy baked topping without drying it out?
Broil, don't bake. Move the finished mac to a baking dish, top it, and broil just until golden. Baking longer steals moisture from the sauce.
Can I use water instead of broth?
Yes. Broth adds extra savoriness, but it also adds salt, so adjust accordingly. Water keeps the flavor more purely cheesy and is less likely to trigger scorching in some pots.
What cheeses melt best?
Freshly shredded cheddar plus a good melter like Monterey Jack or fontina gives you smooth and glossy. Mozzarella works, but it can get a little stretchy and stringy. If you want less cheese pull and more silk, stick with Jack or fontina.